Pixel Mago Speedlite Hands-On Review
september 3, 2014
A couple of weeks back, Pixel sent me their Mago speedlite for testing and reviewing. Today, after a couple of weeks of intensive testing, I will be telling you my thoughts on the Pixel Mago.
First Impressions:
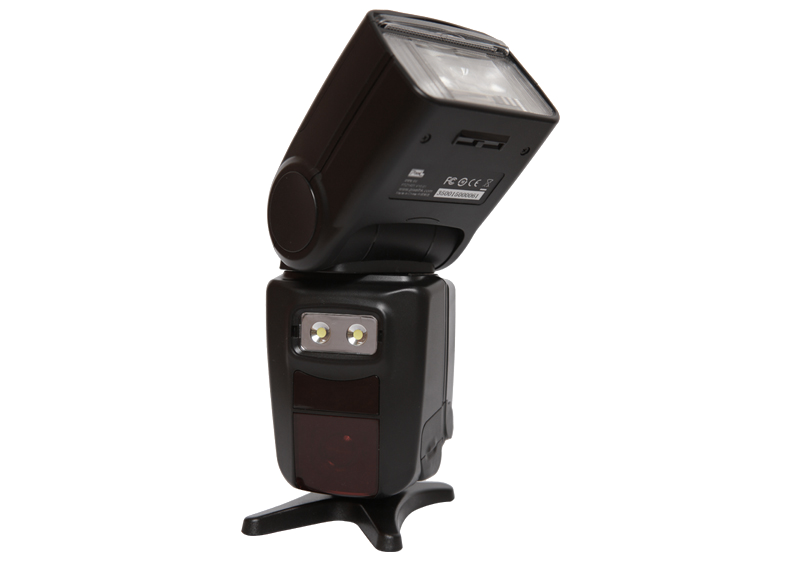
When I first got it out of the box, I noticed how much heavier and better-built than my YN560IIs it was. Everything feels solid and well-made. I also like the fact that the test button actually works on the Mago, unlike on the YN560II, where you have to push it in with brutal force for it to work.
Before we get to the review, lets get the technical specifications out of the way:
- Flash Index: 60@ISO 100/105mm
- Flash Mode: TTL/M/Multi
- Multi Flash Frequency: 1 – 500 MHz (sic?)
- Auto Zoom
- Manual Zoom: 20 – 200 mm
- 1st Curtain Sync and 2nd Curtain Sync
- EV Adjustable
- AF Light
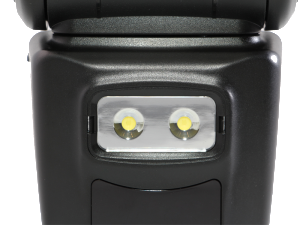
- 2W LED Light
- 2inch LCD Display (192×96)
- Deep Sound Button
- Battery or Flash Head Over-Heat Warning
- Firmware Upgradable
- Support Power Pack Input
- 4 x AA Battery
- Max. Flash Time: 150times @ 1/1 Power (with Sanyo Eneloop Battery)
The First Shoot: A Simple Portrait Session
For this shoot, we didn’t really have anything special planned. All we knew was that we were going to meet up at 10 o’clock, have a guy in a suit, and a forest, and put the Mago to the test.

In this photo, I used the Mago in a parabolic umbrella to the camera right as the key light. Then I had two YN560IIs to the camera left, one in a 70×70 softbox and the other one with no modifier, giving the subject a nice rim light.
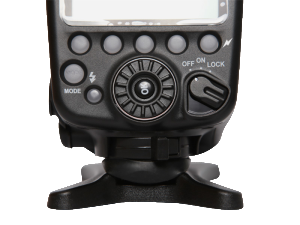
Now, the Mago performed just as expected during this shoot. However, what I noticed was that the wheel seems to have a bit of lag. Sometimes you need to turn it twice or even more for it to respond, which can be quite annoying when you have the flash high up and want to change the power levels. Also another thing I could have wished for was a dumb slave mode for triggering the flash. As of right now, you can only trigger the flash with a radio trigger, sync cord, or a master flash. Maybe these could be fixed in a future firmware update.
The Second Shoot: The Runner
For a very long time, I’ve been looking at an image of a runner by Joel Grimes. Since I had to do something to test out the Mago, I decided to go for it. I found an awesome model, a location, and we went for it.

This photo was lit with 3 speedlites. The Mago was in a parabolic umbrella to the camera left, for the second light I had a barebulb YN560II directly behind her, a little bit above her head, the last light was another YN560II in a 70×70 softbox to the camera right.
After I had finished editing this picture, I was out of ideas until a close friend of mine told me that I should shoot basketball in a similar style. What he had said, sparked a whole new idea in my mind. I decided to take on a series of fine art sports portraits.
The Third Shoot: Basketball
Sooo…

For this series, I decided to go with a very specific style. Every picture has the exact same lighting and perspective. So the lighting setup for this shot is very similar. The only difference was that, since the subject was facing the other way, everything was flipped around.
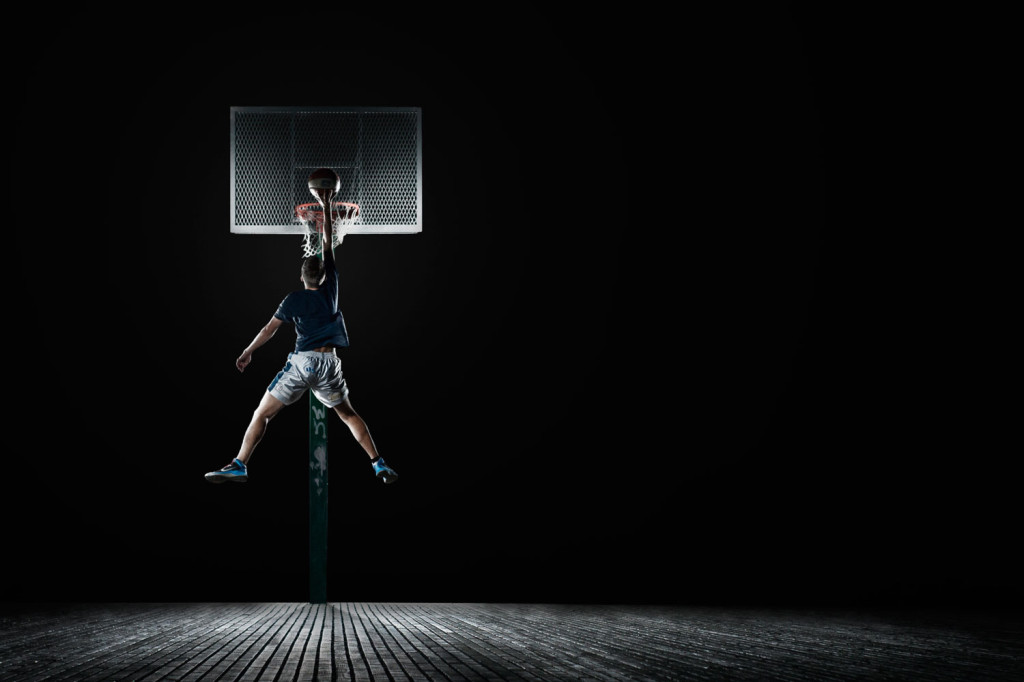
This picture is a bigger composite. First, we shot the basketball player. I had two barebulb YN560IIs giving him a nice rim light, and then the Mago was in a parabolic umbrella acting as the fill/key light. After we were finished shooting the player, I walked around the court lightpainting it for extra drama.
When we were shooting these pictures, we lost track of time. In the end, we found ourselves on a pitch black basketball field in the middle of the night. Packing would have been a complete nightmare, if not impossible, without the 2W LED built into the Mago. It was a life saver. But it can also be used as a modeling light, which is very useful.
The Fourth Shoot: Tennis
As I had decided to take up a series of fine art sports portraits, I decided to shoot tennis next. After a bit of asking around, I managed to find a great model for tennis, who was very fun and easy to work with.

Well, as this is another image in my series, the lighting is the same… Again. So if I tell you that the Mago was in a parabolic umbrella to the camera right, you should be able to piece together the rest of the lighting setup yourself.
What I noticed, when I pulled out the wide-angle reflector panel to fill up the parabolic umbrella, was that the mago automatically sets your zoom to 20mm, and when you push it back in, it goes back to your previous setting. I thought that was kind of cool, really speeds things up.

This is one of those random shots that you take during your shoot and end up liking. It has the same lighting setup as the previous picture, but with some Photoshop magic, I made it look like it was lit by the two lights that you see in the frame.
Another thing that I want to mention is that changing settings accidentally on the Mago is quite hard. If you want to be 100% sure that nothing gets changed, it has a lock setting. To change anything, you first have to press one of the buttons on the flash to activate the scroll wheel. Also the on/off/lock switch is very sturdy, so there’s no chance of accidentally switching it.
The Fifth Shoot: Have Some Cake
As they say, you need to do something different every now and then or things will get boring. Since I started out in the world of product/food photography, I thought it would be good to shoot some (more) cakes.

Well, this dosen’t have anything particular to do with the Mago, but speedlites have their limits when it comes to filling up umbrellas and softboxes evenly due to their fresnel lens design, resulting in slightly harder, uneven light. So for this shoot I decided to use my Caler Jinbei MF100 Barebulb speedlite as the key light, as I wanted extra soft light.
For this image I had the MF100 in the parabolic umbrella to the camera right as the key. To the camera left, behind the cake, I had a YN560II in a 70×70 softbox, giving the cake a nice rim, and seperating it from the background. Then I had another YN560II at 105mm zoom, lighting the background. And finally, the Mago was used as a general fill, bouncing from the ceiling.
Conclusion:
Pixel has done a great job on their first speedlite. There aren’t any issues with it, just some minor things that, most likely, could be fixed with a future firmware update.
I would love to see them add a dumb slave mode, and make the scroll wheel more responsive. Other than that I am very pleased with the Mago. The light output was good and it rivals much more expensive flashes. I also liked the built-in LED light that was very useful at certain times.
All images used with permission.
beta, cake, fine art, food, grimes, Hands-On, jarv, Joel, kristjan, Mago, Pixel, Pixel Enterprise, portrait, Review, speedlite, sports, tester, testing